How to Join Cross Stitch Sides
(Page 2)
Folding, Folding, and More Folding (no, this is not origami!)
In these next few steps, you will be folding, ironing creases, unfolding, then folding in a different direction and ironing again. This sounds complicated, but you'll find that it will make the later steps of sewing the sides together much easier.
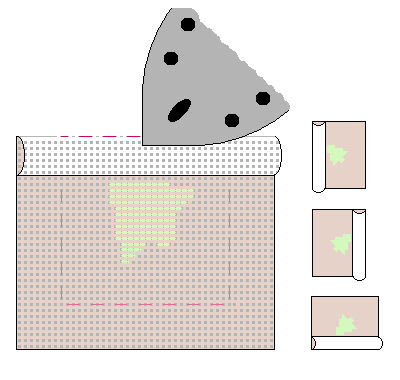
5. With back of Design A facing you, fold the top 1/2" of fabric at the basted line. Iron along the very edge of the fold to make a crease in the fabric. If you have used metallic or blending filament, do this without ironing over the design. Next, unfold that flap and do the same thing. Try not to "un-iron" the crease in the flap you just created. Repeat with all four sides.
It may help to look ahead at the later steps to aid in visualizing this process.
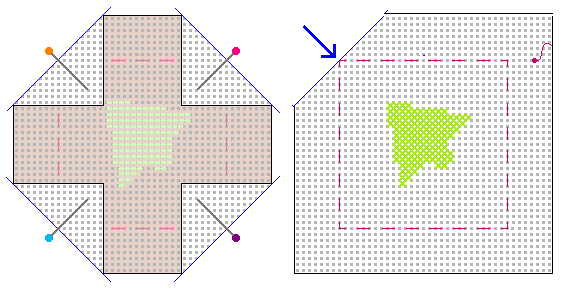
6. With the back of the Design A still facing you, fold down the corner of the fabric. If you look at the other side, your fold should be at the very tip of the basted corner. If doesn't stay in place easily, iron that very tip without "un-ironing" the creases in the side flap. Place a pin there to hold it in place. Do the same with all four corners.
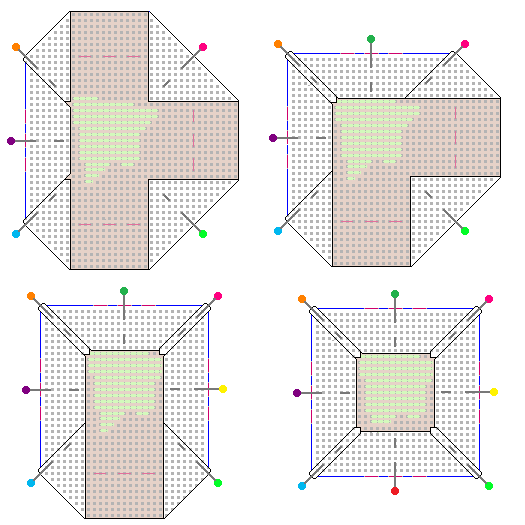
7. Now fold the side flaps down and put a pin in each side.
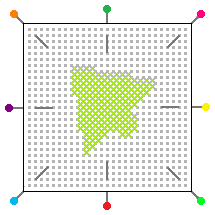
When completed with all four sides, flip the ornament over and you will have a preview of what the finished piece will look like!
Almost Finished!
Click here for the final instructions on page 3
or
Click here to go back to page 1 of this tutorial
Return from How to Join Cross Stitch Sides to How To Cross Stitch
Return from How to Join Cross Stitch Sides to Better Cross Stitch Patterns Home Page
Blog
-
Fabric Mounts
Nov 25, 17 08:17 PM
I want to ditch my old split rail frames and stand. I have read about a new product called, Fabric Mounts. It is supposed to keep material taut and aligned -
Hoops are okay
Nov 25, 17 08:15 PM
I've tried them all . I prefer spring hoops but if my hands are weak I have a difficult time squeezing it. The tension is great if you like taut. I NEVER -
Why a hoop????
Nov 25, 17 08:14 PM
I have never used a hoop and have been cross-stitching for 15 years - only because I didn't think it appropriate. Suddenly I came across this article and -
Don't settle for "almost"
Apr 08, 17 01:16 AM
What do you do when you can't find the perfect cross stitch chart? It happens more than you'd think.
Even though we're no longer limited to the patterns we can find in magazines or at the local craft…