How to Backstitch Your
Cross Stitch Pattern
Second in importance only to the cross stitch, the backstitch enhances and defines areas that have already been cross stitched. I have not done a pattern yet that did not call for this essential stitch.
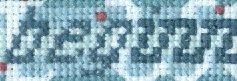
You can see the difference this stitch makes in this cross stitch bookmark. The last three letters are smoother and more defined.
You should learn two methods, the "sewing method," shown later, and the "push and pull" method below. You can use either at any time. However, in some circumstances one will be easier to accomplish.
- In a densely stitched area, the push and pull method will usually be easier to use.
- The sewing method will be faster due to it's combining of motions.
If you master both of these, you'll develop your own sense of when to use each one.
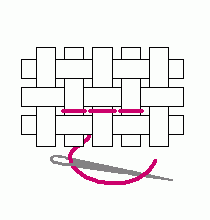
The push and pull method
When teaching children this method, I describe the needle placement as "in front of, in back of, in front of, in back of." It's not a bad way for adults to keep track of where they are either.
Remember to always insert the needle into the same hole the floss previously emerged from, as in the illustrations.
 |
 |
|
1. Bring the needle up "in front of" the starting place. |
2. Bring the needle down "in back of" where the needle came up. |
 |
 |
|
3. Bring the needle up "in front of" the prior stitch. |
4. ..."in back of"... |
 |
 |
|
5. ...and so on... |
6. In your last stitch, insert the needle "in back of." |
 | |
|
7. And your outline is complete! |
Using the backstitch sewing method
Just as in the cross stitch sewing method, this method is done on the front of the fabric. It combines going into and out of the fabric in a single stroke.
 |
 |
|
1. Bring the needle up "in front of" the starting place. |
2. Insert the needle down "in back of" the floss and out of the fabric "in front of" the floss in a single motion. |
 |
 |
|
3. Circle your needle around and... |
4. Next, insert your needle into the fabric "in back of" the floss and out of the fabric "in front of" the floss in a single motion. |
 |
 |
|
5. Swing around... |
6. In your last stitch, insert the needle into the fabric "in back of." |
 | |
|
7. And your outline is complete! |
If you have a comment or question about this lesson, or if you would like to suggest a new one, please go to our Contact Us page. (We promise not to use your email address for any other purpose.)
Home › How to Cross Stitch › How to Backstitch
Blog
-
Fabric Mounts
Nov 25, 17 08:17 PM
I want to ditch my old split rail frames and stand. I have read about a new product called, Fabric Mounts. It is supposed to keep material taut and aligned -
Hoops are okay
Nov 25, 17 08:15 PM
I've tried them all . I prefer spring hoops but if my hands are weak I have a difficult time squeezing it. The tension is great if you like taut. I NEVER -
Why a hoop????
Nov 25, 17 08:14 PM
I have never used a hoop and have been cross-stitching for 15 years - only because I didn't think it appropriate. Suddenly I came across this article and -
Don't settle for "almost"
Apr 08, 17 01:16 AM
What do you do when you can't find the perfect cross stitch chart? It happens more than you'd think.
Even though we're no longer limited to the patterns we can find in magazines or at the local craft…