How to Use Memory Thread to Add a 3D Look to Your Projects
Memory Thread, introduced by DMC this year, enables you to add a 3D quality to your cross stitch projects. This "thread" consists of a pliable copper wire covered in soft fiber. It is fade-resistent, acid free and comes in 28 colors.
Besides lots of other craft applications, it is used to embellish your counted cross stitch projects. You shape it, and then tack it on top of your completed stitching.
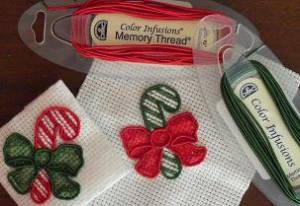
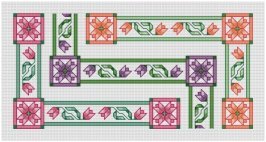
As you can see, this thread was the perfect thing to add a third dimension to these newly-designed, mini cross stitch Christmas ornaments. It's a great way for a small item to have a big impact.
It is easy to use, and they have matching floss shades so that your stitches holding it down are virtually invisible, if that's what you like. Try a contrasting color for a different effect.
Although DMC publishes a list of recommended floss matches, you should hold your skein of Memory Thread next to the floss, in person. I found that the color they recommended for my green did not match as well as another floss shade.
How to Apply DMC Memory Thread
A couple of notes about the following instructions: I will refer to Memory Thread as "wire" so as to distinguish it from the floss. The floss and wire are shown in contrasting colors to make it easier to see these different elements.
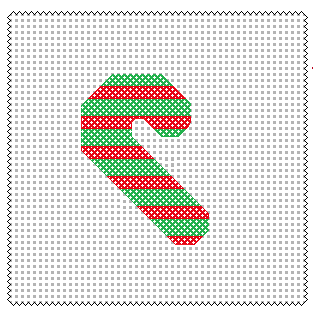
Finish cross stitching your project. Choose a coordinating or contrasting color of Memory Thread (wire).
Estimate the amount of wire needed. Unwinding the wire from the bobbin, lay it over your cross stitch design. Starting at one end, bend it to the desired shape. Don't be afraid to work with it--you can easily straighten it and try again.
A small jewelers pliers or even household tweezers can help you make sharp corners. However, at this point, you don't have to match the shape exactly--you just want to know how long to cut the wire you'll be using.
It is better to have a little extra than to come up short. Then add an inch to this length (1/2 inch for each end) so you can bury the ends.
Cut this length of wire--scissors will do this easily. But don't use your good floss scissors, as it will dull them over time.
Because the fiber covering will begin to unravel the more you work with the wire, put Fray Block on each end. This will also help you recut a clean tip if you are having trouble "threading" it through a hole to the back of the fabric.
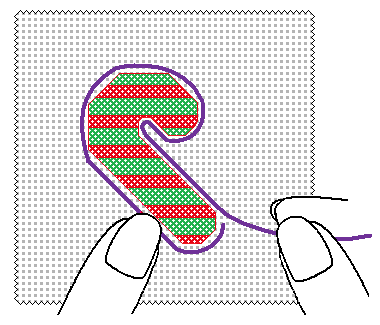
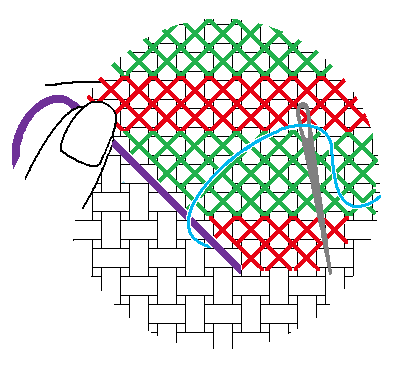
Decide where to start the wire. In the photo above, the cross stitch ribbon provides a natural place to start and stop the red wire surrounding the candy cane. If that doesn't exist in your pattern, look for the most pleasing place to start and stop.
"Bury" the wire. On the front of your fabric, enlarge the hole where you will start your wire. I tried an extra large darning needle and the blunt end of a small crochet hook. Both worked well. (The hole will not remain enlarged--it will close in around the wire as you handle your fabric.)
From the front, push about a half inch of wire from the front to the back. At this point, do not yet tack down this end to the back. I like to complete the wire application on the top, first. Then, find the best direction to lay it (plus the other end) smoothly on the back and secure them then.
While holding the wire in place on the top, you will use couching stitches to tack it down.
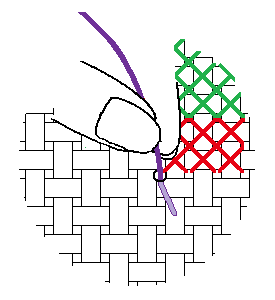
Couching stitches are a group of stitches that help add an outline or give more weight to an area or line. There are several kinds, but in this case, you will use a basic stitch.
Begin with a single strand of floss. Knot and bury the end on the back. Come up with your needle in the first hole after where the wire emerges.
Please click here for page 2.
Note: I have started dividing some of my pages into parts so they will load faster, especially with many illustrations or pictures.
Return from Memory Thread to How to ...
Return to Better Cross Stitch Patterns Home Page
Blog
-
Fabric Mounts
Nov 25, 17 08:17 PM
I want to ditch my old split rail frames and stand. I have read about a new product called, Fabric Mounts. It is supposed to keep material taut and aligned -
Hoops are okay
Nov 25, 17 08:15 PM
I've tried them all . I prefer spring hoops but if my hands are weak I have a difficult time squeezing it. The tension is great if you like taut. I NEVER -
Why a hoop????
Nov 25, 17 08:14 PM
I have never used a hoop and have been cross-stitching for 15 years - only because I didn't think it appropriate. Suddenly I came across this article and -
Don't settle for "almost"
Apr 08, 17 01:16 AM
What do you do when you can't find the perfect cross stitch chart? It happens more than you'd think.
Even though we're no longer limited to the patterns we can find in magazines or at the local craft…