How to Make a Quarter Stitch
You will easily master the quarter stitch after doing a few. Still, if you have never done stitching, you may want to avoid a pattern that contains many partial stitches since they can be hard to count. See my how-to page on making a cross stitch row.
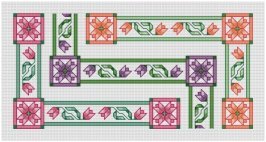
Designers use partial stitches to smooth edges and round corners. They may be stitched alone along the outer edge of a design or combined within a body of full cross stitches.
How they are represented varies from one designer to another, and some details of how they are constructed may be left up to you.
Always review the entire pattern and instructions before beginning. As long as you make them consistent throughout the entire project, you have a little leeway.
They can be found listed like other categories of embroidery stitches, similar to backstitches and straight stitches, on the color key or legend for your project.
The legend will specify the number of strands to work with and the direction of each stitch, and each floss color will be represented by a different symbol.
Remember that partial stitches can slant in any direction, so adapt the following instructions to fit your needs.
On your pattern, the symbol for a full cross stitch may look like this.

A Quarter stitch for that same color will look like one of these.

The square is divided by a slanted line. A smaller version of the symbol occupies the quadrant to be stitched.
The one I have embroidered below would be represented this way.

How to quarter stitch
 |
 |
|
1. In this example, locate the lower left corner and bring the needle up through the fabric. |
2. Crossing diagonally, insert the needle half a stitch from the origin point, pulling the floss completely through to the back. |
 | |
|
3. Your stitch is finished. |
If you have a comment or question about this lesson, or if you would like to suggest a new one, please go to our Contact Us page. (We promise not to use your email address for any other purpose.)
Home › How to Cross Stitch › Quarter Stitch
Blog
-
Fabric Mounts
Nov 25, 17 08:17 PM
I want to ditch my old split rail frames and stand. I have read about a new product called, Fabric Mounts. It is supposed to keep material taut and aligned -
Hoops are okay
Nov 25, 17 08:15 PM
I've tried them all . I prefer spring hoops but if my hands are weak I have a difficult time squeezing it. The tension is great if you like taut. I NEVER -
Why a hoop????
Nov 25, 17 08:14 PM
I have never used a hoop and have been cross-stitching for 15 years - only because I didn't think it appropriate. Suddenly I came across this article and -
Don't settle for "almost"
Apr 08, 17 01:16 AM
What do you do when you can't find the perfect cross stitch chart? It happens more than you'd think.
Even though we're no longer limited to the patterns we can find in magazines or at the local craft…